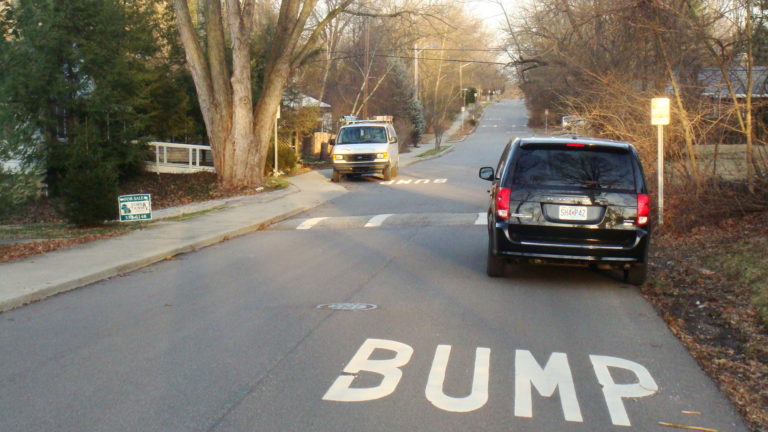
Asphalt Speed Bump Process: The modest speed bump is not something anyone really appreciates, especially when they are in a hurry and have to slow down to avoid hitting one. These asphalt constructions, which range in height from 3″ to 6″, have saved lives for several years. Their use has been proven to be an effective means of slowing down traffic and directing it appropriately.
 Speed bumps are an integral part of every parking lot’s infrastructure. They slow down vehicles in areas with high pedestrian traffic, preventing pedestrians from being injured.
As a matter of fact, speed bumps could be one of the only things that might successfully deter drivers from being irresponsible. The likelihood that no one would intentionally lower their speed while approaching crossings or heavy-traffic areas in the absence of speed bumps is relatively high.
You may come across speed bumps made of various materials, including plastic, metal, and concrete; however, asphalt speed bumps are the most prevalent and arguably the most popular traffic control device.
Asphalt speed bumps are advantageous in many ways. For example, they are more durable than plastic or rubber, which you must replace every year.
Although installing an asphalt speed bump seems tricky, it is easier than you would assume. Let us walk you through the process of installing an asphalt speed bump so that you can be confident that you are doing it right the first time around.
Setting up the location
The first step in installing asphalt speed bumps is to mark and prepare the area where you will install the bumps.
You will want to mark the area with a saw to make it easier to work with later.
When you are saw cutting, it is best to have a one-foot distance between the saw and the curb or pathway — you will not have to worry about interrupting water flow this way.
The speed bump’s width and length will also be important considerations to take into account. A speed bump is typically 2 to 3 feet wide and 3 to 4 inches high.
Laying the asphalt
You can proceed to the next step after you are done saw cutting and removing the asphalt — laying the asphalt down.
 To compact the asphalt once it has been set down in the first layer, use a manual tamping machine to help the asphalt settle in.
After the first coat has been thoroughly set, you can begin installing the speed bump. The first layer of the speed bump should be up to three inches high and raked to prevent it from getting messy.
Next, you will want to use a speed bump lute, which is a rake-like instrument used to create the speed bump.
As the hot asphalt begins to spread, be sure to clean around the edges and manually tamp the asphalt to ensure that it is locked in.
Finish by running a plate compactor over the bump and manually tamp areas where the compactor cannot reach them. This will yield the best results.
Cooling and striping
 Understanding how an asphalt speed bump is installed is important, but it is just as important to understand how long the process will take.
You will need to allow the speed bump some time to cool down once it has been installed.
Because the asphalt is hot, you will want to create a perimeter around it to allow it to cool. Asphalt can cool in as little as half an hour, but it is best to leave it for an hour or more.
After the asphalt has completely dried, you can start stripping it. It should not take more than an hour or two for the paint to completely dry — just like the asphalt itself did.
Address
Commonwealth Paving, 136 Outerloop, Louisville, Kentucky 40214
Phone: 502-459-7283, Fax: 502-456-2678
Opening Hours
| Monday | 9:00 AM – 5:00 PM |
| Tuesday | 9:00 AM – 5:00 PM |
| Wednesday | 9:00 AM – 5:00 PM |
| Thursday | 9:00 AM – 5:00 PM |
| Friday | 9:00 AM – 5:00 PM |
| Saturday | Closed |
| Sunday | Closed |


