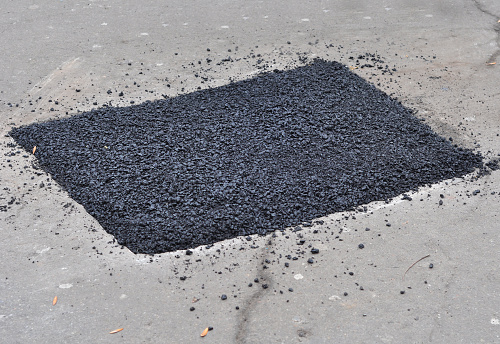
Patch a Large Crack: Concrete is a resilient and long-lasting material; however, it is susceptible to cracking if not laid properly.
Several different factors can cause concrete cracks. This is primarily due to the effects of the outside elements (rain or wear and tear) and the way the concrete was laid.
Concrete can crack due to a variety of reasons, including the following:

The wrong strength concrete for the slab was poured.
- There was an excessive amount of water added to the concrete mix.
- The slab of concrete dried too fast.
- Not enough (or wide enough) control joints were included in the slab.
- The concrete was poured onto frozen ground, snow, or ice.
- The ground was not compacted properly.
- The concrete slab expanded due to hot weather.
- The ground moved over time.
- Concrete cracked or broke due to overloading (too much weight).
Is your concrete floor cracked and needs to be repaired? If yes, you should pay special attention to the edges and the mix if you want a patch job that will last a long time. In this blog, we will show you how to patch cracks on your concrete flooring.
A repair made by pouring wet concrete into a crack in your concrete floor will not be long-lasting. Preparing the edges and using the appropriate materials is necessary for the best patching job.
Using concrete to patch a large crack?
 A coarse, gravel, and/or crushed-stone aggregate concrete mix is necessary for holes 1 inch or deeper — and it must be able to bind well with the existing concrete in the crack. Shallower cracks require a sand/topping mix.
Regardless of the type of mix you choose (they are both available at home improvement centers), follow these steps for the best results:
Step 1: Use a machinist’s hammer (also called “ball-peen hammer”) or a small sledgehammer (also called “club hammer”) and a cold chisel to level the bottom of the crack. This will also help you slightly undercut the sides of the crack so that the patch will not come free during installation. After vacuuming the area, use water and a stainless steel wire brush to clean it thoroughly.
Step 2: Apply a thin layer of concrete bonding adhesive with a brush. Concrete bonding agents are available in bottles at most home improvement stores.
Step 3: Make sure the concrete is thoroughly mixed while the bonding agent is still tacky. Pour some of the concrete into the crack after it has been mixed with water. Using a trowel, work it into the corners and up against the edges. Fill the crack completely, leaving a mound of material on top.
Step 4: It is now time to level the patch. Burnish the surface with a steel trowel in the final few passes to make it as smooth as possible. Use a straight-edge board that is at least a foot longer than the width of the crack. Work it by moving it back and forth (in a sawing motion), as this will help drive the aggregate down and make the final smoothing a little easier.

The surface should be leveled with a magnesium or wood trowel when it has lost its wet gloss and feels firm to the touch — this will not interfere with the curing process. Use a fanning motion with the trowel to blend the edges of the new concrete with the previous concrete. Repeat this process multiple times while the mixture cures. Pull a damp push broom across it to add texture to the concrete. Before walking on the patch or driving on it, we recommend that you wait at least one full day and at least one week, respectively.
Tip: The temperature of the existing concrete must be maintained at or above 50° F for the first 24-48 hours of patching. The curing time increases proportionally to the colder the weather gets.
Address
Commonwealth Paving, 136 Outerloop, Louisville, Kentucky 40214
Phone: 502-459-7283, Fax: 502-456-2678
Opening Hours
| Monday | 9:00 AM – 5:00 PM |
| Tuesday | 9:00 AM – 5:00 PM |
| Wednesday | 9:00 AM – 5:00 PM |
| Thursday | 9:00 AM – 5:00 PM |
| Friday | 9:00 AM – 5:00 PM |
| Saturday | Closed |
| Sunday | Closed |


